10 Emergency Survival Skills You Need To Know

In a world increasingly cushioned by the conveniences of modern life, the importance of possessing basic survival skills is often underestimated. Yet, the knowledge of how to sustain oneself in the wilderness is not just a relic of the past or a niche interest for the adventurously inclined. In my opinion, it is a fundamental aspect of being human. This article is a simple but important guide on why mastering emergency survival skills is a non-negotiable part of living a full and prepared life.
Benefits of Learning Emergency Survival Skills
By reading this article, you will learn: How to build a fire, find and purify water, cook food, build a shelter, administer first aid, signal for help, navigate, handle an animal attack, stay calm in a crisis, and use a survival kit. – Why knowing these skills can be crucial in emergency situations, such as getting lost in the wilderness or facing natural disasters. – The practical importance of learning emergency survival skills for ensuring personal safety and well-being.
1. How to Build a Fire

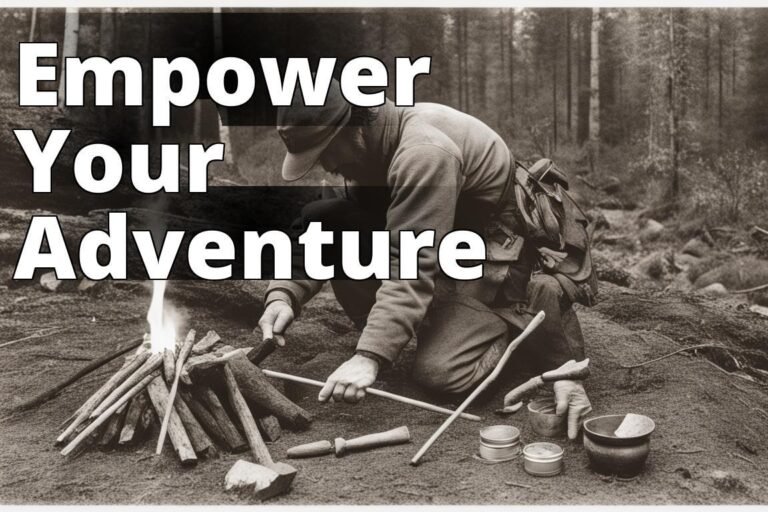
The glow of a fire is the heartbeat of a survival situation. It’s not merely a source of warmth; it’s a beacon of hope and a nucleus around which survival strategies revolve. From my own experiences in the biting cold of the Rockies, I can attest to the fire’s dual role as a psychological and physical lifeline. Here’s a streamlined guide: – Gather: Dry tinder, kindling, and larger fuel wood. – Structure: Arrange your tinder, then build a teepee of kindling around it. – Ignite: Use matches, a lighter, or a fire starter to light the tinder. – Maintain: Gradually add larger pieces of wood, ensuring the fire has enough ventilation.
Insider Tip: Always have at least two methods of starting a fire in your survival kit. Redundancy could save your life.
1. The Hand Drill Method
Materials Needed:
- A spindle (a straight, dry stick about 2 feet long)
- A fireboard (a flat piece of wood)
- Tinder (dry leaves, grass, or bark)
- Kindling (small sticks)
Steps:
- Prepare the Fireboard: Cut a small, shallow depression near the edge of the fireboard. Then, cut a V-shaped notch into the board that leads into the depression.
- Position Your Spindle: Place the spindle into the depression on your fireboard.
- Create Friction: Use both hands to rapidly roll the spindle between your palms, pressing it down onto the fireboard.
- Generate an Ember: Continue until you create enough heat to produce a small ember in the notch of the fireboard.
- Transfer the Ember: Carefully transfer the ember to your nest of tinder.
- Ignite the Fire: Gently blow on the ember until it ignites the tinder. Add kindling to build your fire.
Hand Drill Method:
- Preparing the fireboard and spindle.
- Positioning the spindle.

The illustration above showcases the first two steps of the Hand Drill Method for starting a fire in the wilderness. It depicts the preparation of the fireboard and spindle, followed by the positioning of the spindle, capturing the initial stages of this fire-starting technique.
2. The Flint and Steel Method
Materials Needed:
- A piece of flint (or any hard, sharp-edged rock)
- Steel (a pocket knife, back of a blade, or a specific striker)
- Char cloth (a piece of fabric made from vegetable fiber that has been charred but not burnt)
- Tinder and kindling
Steps:
- Prepare Your Tinder: Create a nest of tinder where you will catch the sparks.
- Position the Char Cloth: Place the char cloth on top of the flint, close to the edge.
- Strike to Create Sparks: Strike the flint with your steel striker. Aim to direct the sparks onto the char cloth.
- Catch a Spark: Continue striking until a spark lands on the char cloth and begins to glow.
- Transfer to Tinder: Carefully wrap the glowing char cloth in your tinder nest.
- Ignite the Fire: Blow gently on the tinder nest until it ignites. Add kindling to build your fire.
The illustration above captures the Flint and Steel Method for starting a fire in the wilderness, from preparing the tinder to igniting the fire with sparks created by striking flint and steel. This visual guide demonstrates the critical steps of this traditional fire-starting technique.
These illustrations provide a visual understanding of both the Hand Drill and Flint and Steel methods, highlighting key steps in each process for starting a fire without matches or a lighter in a survival situation.
Both methods require practice to master, especially under different weather conditions. Always remember to gather your materials and prepare your fire site before attempting to start a fire.
2. How to Find and Purify Water
In a survival situation, without water, the human body can only survive for about three days. Finding and purifying water is, therefore, a skill of paramount importance. Clear, flowing water is your best bet, but don’t take its cleanliness for granted. Boiling is the most effective method of purification, but when that’s not possible, chemical purifiers or filters can be lifesavers.
Insider Tip: Always purify water, no matter how pristine it appears. Microorganisms too small to see can cause severe illness.
If you find yourself lost in the wilderness and in need of water, there are several methods you can use to collect water from plants and trees, which can be a vital source of hydration. Here’s a summary of the techniques:
- Transpiration Method: This involves using a clear plastic bag to collect water vapor released by plants. You’ll need to tie the bag around a branch with leaves, weighing it down with a small stone. Leave the setup during daylight to collect moisture, which condenses inside the bag. This method works best in hot, sunny weather.
- Tapping Trees: Certain trees can be tapped for water, especially in late winter and early spring. By making a small hole in the trunk and inserting a spile (a small tube or twig), you can collect the sap, which contains water. Maple, birch, walnut, and hickory trees are suitable for this method, with the sap being clean and slightly sweet.
- Solar Still: A solar still can extract and purify water from the soil and plant material using condensation. Dig a hole, place a container in the center, and cover it with a plastic sheet. Place weights around the edges and a small stone in the center of the sheet above the container. Moisture from the ground and plant material inside the hole will condense on the underside of the sheet and drip into the container.
- Harvesting Snow: Snow can be melted to provide water. It’s important to select clean, fresh snow and melt it slowly, adding a little liquid water if available to prevent a burnt taste. Remember, directly consuming snow can lead to dehydration and should be avoided.
- Harvesting Drinking Water from a Tree: Late winter to early spring is the best time to tap into trees like birch and maple. The sap collected is rich in minerals and vitamins. To tap a tree, prepare a twig to act as a spigot, scrape the outer bark to expose the softer inner layer, and insert the twig-spigot to collect dripping water.

Transpiration Method: Showcasing how to collect water vapor using a plastic bag tied around a leafy branch.

Tapping Trees for Water: Highlighting the process of tapping trees like maple or birch to collect sap.

Solar Still Construction: Demonstrating the setup of a solar still to extract water from the soil through condensation.

Harvesting Snow for Water: Illustrating the method of safely melting snow to produce water.

Harvesting Drinking Water from a Tree: Showing how to tap into a tree to collect mineral and vitamin-rich sap.
Each of these methods requires careful consideration of the environment and available resources. Always ensure the water collected is clean and safe for consumption, and be aware of the potential presence of harmful substances in some plant saps or contaminated snow.
3. How to Find and Cook Food
In the wilderness, your grocery store is the land around you. Edible plants, insects, and small game can become vital sources of nutrition. However, the key is knowing what’s safe to eat. Invest time in learning local flora and fauna, and always err on the side of caution.

When it comes to cooking, simplicity is your friend. A small game can be roasted over an open fire, while foraging skills can provide a surprising variety of plant-based foods.
Insider Tip: A compact, portable guide to edible plants and animals in your region can be an invaluable addition to your survival kit.
Universal Edibility Test:
The Universal Edibility Test is a systematic procedure to determine if a plant is safe to eat when you are unsure about its edibility. It is particularly useful in survival situations. Follow these steps carefully to minimize the risk of poisoning:
1. Separate the Plant
- Identify: Separate the plant into its basic components: leaves, stems, roots, buds, and flowers.
2. Test for Contact Poison
- Skin Contact: Crush a part of the plant and rub it on the inside of your wrist or elbow. Wait for 15 minutes.
- Observe: Check the area for any reaction, such as itching, burning, or redness.
3. Prepare the Plant Part
- Selection: Choose one part of the plant for testing. If no reaction occurs during the skin test, proceed to prepare it as you would for eating (boil if necessary).
4. Touch Test
- Lip Test: Place a prepared piece of the plant part on your outer lips for 3 minutes.
- Sensitivity Check: If there is no burning, itching, or other irritation, proceed to the next step.
5. Taste Test
- Tongue Test: Place the plant part on your tongue for 15 minutes without chewing.
- Taste Reaction: If there is no unpleasant taste or reaction, proceed to the next step.
6. Chew Test
- Chewing: Chew the plant part for 15 minutes but do not swallow.
- Observe: If there is no irritation or bad reaction, spit it out and wait for another 15 minutes.
7. Swallow Test
- Small Portion: If after all the above tests there is no adverse reaction, swallow a small portion.
- Wait: Wait for 8 hours. During this period, do not eat anything else.
8. Observe for Reactions
- Monitor Symptoms: If there are no ill effects after 8 hours, the plant part may be considered edible. However, start with small amounts to ensure there is no delayed reaction.
Important Notes:
- Perform the test on one plant part at a time. Do not mix different parts during the test.
- If at any point there is a reaction, do not consume the plant part.
- Remember, just because one part of the plant is edible does not mean all parts are. Test each part separately.
- Always err on the side of caution when foraging for food in the wild.
This test is a last resort and should only be used when you are in a survival situation without other food sources. Knowing local plants and their edibility before venturing into the wilderness is always recommended.
Foraging For Food in The Wild Recap:
- Universal Edibility Test: This approach helps determine the edibility of plants you’re unfamiliar with. It involves several steps, including skin contact tests, a chew test without swallowing, and finally consuming a small amount if no adverse reactions occur. It’s important to fast for 8 hours before starting the test and to test each part of the plant separately, as some parts may be edible while others are not.
- Familiarity and Caution: Only consume plants that you can positively identify and are sure are safe to eat. Many edible plants have dangerous look-alikes. For instance, wild onions are a great food source but should only be consumed if they smell like onions, as there are poisonous plants that look similar but lack the onion scent.
- Nutritional and Medicinal Benefits: Native Americans used a variety of plants for their health and nutritional benefits. Echinacea, for example, is known for its immune-boosting properties and is a rich source of vitamins and minerals. Goldenseal offers antibacterial and antifungal effects, and rosehip is praised for its high vitamin C content and benefits to skin and hair health.
When foraging:
- Avoid plants with milky or discolored sap, bitter or soapy tastes, and those with spines or thorns, as these can indicate toxicity.
- Be wary of plants growing near polluted areas or in contaminated water, as they can absorb and carry these pollutants.
- Consider the nutritional content and potential medicinal benefits of the plants you find, focusing on those known to be used by Native Americans for their healthful properties.

Always remember, the safest way to forage is with the knowledge and positive identification of the plants in your area. When in doubt, avoid it.
4. How to Build a Shelter
Shelter is not just about comfort; it’s a critical barrier against the elements. The type of shelter you build will depend on your environment and the materials available. A simple lean-to, made from branches and foliage, can offer significant protection in many climates.
Creating a shelter is as much about location as it is about construction. Avoid low-lying areas prone to flooding, and always stay aware of potential hazards like falling branches.

5. How to Administer First Aid
First aid knowledge can turn dire situations around. Understanding how to treat basic injuries, recognize signs of hypothermia or heatstroke, and perform CPR are all skills that can save lives, including your own.
Insider Tip: Keep a well-stocked first aid kit in your survival gear, and familiarize yourself with its contents before you need to use it. Even a simple portable first aid kit could be enough to save a life, or a limb.
6. How to Signal for Help
Being found is often the final hurdle in a survival situation. Three of anything (sounds, fires, or symbols) is an internationally recognized distress signal. Reflective surfaces, whistles, and brightly colored clothing can all aid in your rescue.
Insider Tip: Practice using a signal mirror. Properly angled, it can catch the attention of rescuers miles away.
- Create a Signal Fire: Start a fire using your lighter. To ensure the smoke is visible, add green vegetation to the flames once it’s going strong. This produces black smoke, which is more noticeable and can indicate that someone needs rescue.
- Use Bright-Colored Fabrics: Your clothing can serve as a signal. If you have any bright-colored items, use them to make a makeshift flag. Place it in an open area or hang it from a high point to increase visibility.
- Ground-to-Air Signals: If you’re in an open area, create symbols on the ground using rocks, branches, or any contrasting materials you can find. These symbols can communicate your need for help to searchers in aircraft.
- Mirror Signals: If you have any reflective item or can polish your knife to a shine, use it to reflect sunlight. Aim the reflection towards potential rescuers or overhead aircraft. The universal distress signal, which is three flashes, can be used to catch attention.
- Whistle Blasts: Although you may not have a whistle, creating high-pitched noises can attract attention. You can attempt to whistle loudly, use your knife on a metal surface to create a ringing sound, or find other creative ways to make noise.
- Improvised Visual Signals: Anything that stands out in your environment can be used as a signal. This includes arranging items in the shape of an SOS, using reflective materials to catch the sun’s rays, or even using your lighter at night if it produces a sufficient light source
7. How to Navigate
In the age of GPS, traditional navigation skills have waned, but knowing how to use a map and compass could save your life. Familiarize yourself with the basics of reading topographical maps and orienting yourself with a compass.
Insider Tip: Always carry a physical map and compass in addition to any electronic devices. Batteries die, but a compass does not.

8. How to Handle an Animal Attack
Wildlife encounters can be one of the more unpredictable aspects of wilderness survival. The best strategy in prevention is to understand the wildlife in your area and take steps to avoid attracting or provoking animals. If an attack does occur, having knowledge of the specific defensive techniques for the animal you’re facing is crucial.
Insider Tip: Bear spray is a highly effective deterrent for many types of wildlife, not just bears. Keep it accessible at all times.
In North America, there are several top predators that one might encounter in the wilderness. Here’s a summary of some of these predators and how to protect yourself against their attacks:

1. Polar Bear
- Defense: Polar bears are the apex predators of the Arctic and can be extremely dangerous. If you encounter a polar bear, do not run. Use noise to try to scare it away and use any deterrents you have, such as pepper spray. In a worst-case scenario, use whatever weapons you have to defend yourself.
2. Mountain Lion
- Defense: Do not run or crouch down, as this may trigger an attack. Try to appear larger and maintain eye contact. Make loud noises and fight back if attacked, aiming for the face and eyes.
3. Grizzly Bear
- Defense: If you encounter a grizzly, do not run or make sudden movements. Speak in a calm firm tone to identify yourself as human and not prey. If attacked, lie flat on your stomach, cover the back of your neck, and play dead. Only fight back in the event of a prolonged attack. A Grizzly Bear can reach speeds of 35 mph so outrunning them is not an option.
4. Wolves
- Defense: Wolves are less likely to attack humans but can be dangerous in packs. Do not run, as this may trigger a chase. Stand tall, make noise, and try to appear larger. If attacked, fight back vigorously.
5. Wolverine
- Defense: Wolverines are smaller but fierce. The best defense is to avoid attracting their attention or cornering them. If attacked, defend yourself with whatever means are available, focusing on deterring rather than incapacitating the animal.
General tips for all encounters include making noise to avoid surprising an animal, traveling in groups, keeping a clean camp to avoid attracting wildlife, and carrying bear spray or a loud whistle as deterrents. Always be aware of your surroundings and the wildlife that inhabit the area you’re exploring.
9. How to Stay Calm in a Crisis
Perhaps the most underappreciated survival skill is the ability to stay calm and think clearly under pressure. Panic is a survival situation’s worst enemy. Practice mindfulness and stress-reduction techniques regularly.
“Between stimulus and response, there is a space. In that space is our power to choose our response. In our response lies our growth and our freedom.” – Viktor E. Frankl
10. How to Use a Survival Kit
A survival kit is only as useful as the knowledge one has to use it. Familiarize yourself with each item in your kit: know how to use your fire starter, water purifier, first aid supplies, and any other tools you have packed.
Insider Tip: Customize your survival kit to match your environment and skill level. There’s no one-size-fits-all when it comes to survival.
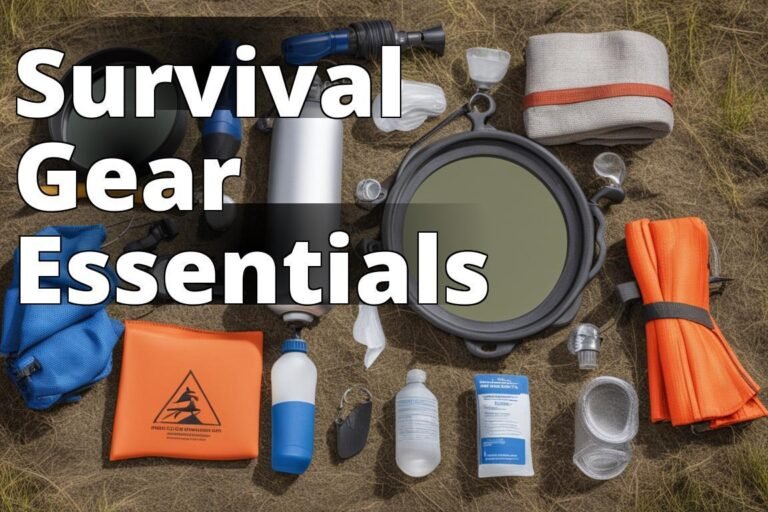
For a generic outdoor survival kit for most situations make sure to include essential items such as:
- a compact tent or tarp
- warm sleeping bag
- insulated pad
- emergency blanket
- lightweight high-calorie food
- fishing gear or snares
- fire-starting tools
- knife
- multi-tool
- water filter or purification tablets
- collapsible water container
- compass and map or GPS
- signal mirror
- whistle
- first aid kit
- paracord or rope
- headlamp or flashlight
- duct tape
- personal hygiene items
- survival manual or guidebook
Incorporating these skills into your emergency survival tool bag isn’t just about preparing for the worst; it’s about embracing a mindset of self-reliance and respect for the natural world. As you embark on this journey, remember that survival is not just about enduring the wilderness, it’s about thriving within it.
For further reading and to deepen your understanding, explore our related articles:
- Why You Should Learn Outdoor Survival Skills
- Reasons to Learn Bushcraft Skills
- How to Survive Lost in the Wilderness
- And many more available on BackcountryTrax.com.
Master these essential survival skills, not out of fear, but as a celebration of your capability and resilience. The wilderness awaits, not as an adversary to be conquered, but as an ancient teacher, ready to impart the wisdom of survival to those willing to learn.
FAQ
Q: Who needs to learn emergency survival skills?
A: Everyone! Whether you’re an outdoor enthusiast, a frequent traveler, or simply someone who wants to be prepared for any situation, knowing basic survival skills is essential.
Q: What are the most important survival skills to know?
A: Key skills include making a fire, finding and purifying water, identifying edible food, building a shelter, administering first aid, signaling for help, navigating, handling wildlife encounters, maintaining calm in crises, and utilizing a survival kit effectively.
Q: How can I acquire outdoor survival skills?
A: Start by reading reliable resources, watching instructional videos, and practicing skills in safe, controlled environments. Consider enrolling in survival courses or workshops led by experts for hands-on learning.
Q: Is it really necessary to learn survival skills in today’s modern world?
A: Absolutely. Emergencies and natural disasters can occur unexpectedly, and having survival skills can significantly increase your chances of staying safe and helping others.
Q: Why are survival skills crucial for personal safety?
A: These skills empower you to respond effectively to emergencies, manage basic needs in the absence of modern conveniences, and make informed decisions in critical situations.
Q: How much time is required to learn basic survival skills?
A: Learning the basics can take as little as a few days of dedicated practice, but mastering these skills requires ongoing practice and experience. Regularly refreshing your knowledge and skills is also important.
Q: Can survival skills really make a difference in an emergency situation?
A: Yes, significantly. From creating a fire for warmth to navigating your way out of remote areas, these skills can be the difference between life and death.
Q: How do I know which survival skills are most relevant to me?
A: Assess your typical environments and potential risk factors. For example, if you hike in the mountains, focus on skills like navigating and handling wildlife. If you’re near water bodies, prioritize learning to find and purify water.
Q: Are there any resources you recommend for beginners interested in learning survival skills?
A: Start with basic survival guides and manuals, reputable outdoor survival websites, and introductory courses offered by outdoor organizations. Books on local flora and fauna can also be invaluable.
Q: How can practicing survival skills benefit my everyday life?
A: Beyond emergency preparedness, survival skills enhance problem-solving abilities, boost confidence, encourage a proactive mindset, and deepen your connection with nature.
Embrace the journey of learning survival skills as a way to enrich your life, ensure your safety, and celebrate your capability to adapt and thrive in any situation.


